How to... bleed brakes
Five essential tips
By Alan Dowds
HYDRAULIC brake setups are excellent reliable systems these days, and generally get by without too much in the way of regular maintenance. But over time, the hydraulic fluid inside the lines and calipers absorbs water from the atmosphere, and needs refreshing. Bleeding the lines with fresh fluid every six months or so can restore feel and power – and if you do any work on the brakes, like swapping lines or replacing seals, you need to bleed all the trapped air out after the work.
Here are five essential tips on bleeding your brakes.
1 Choose your kit
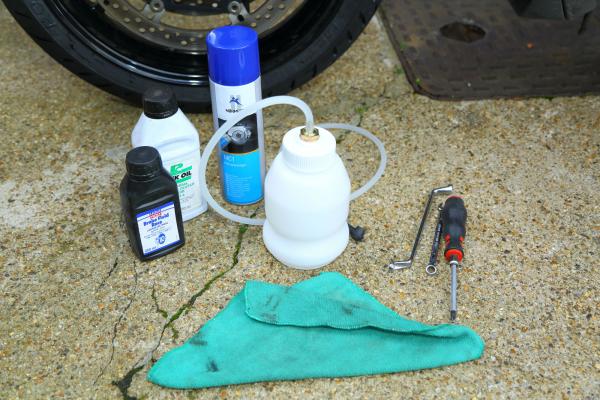
Strictly speaking, you don’t need anything except a spanner to open the bleed nipple, and a screwdriver to open the reservoir cap. And back in the 1980s when I started riding, that's all we had. Pump the brake lever, hold it into the bar against the pressure, loosen the nipple, let the old fluid/air out, tighten the nipple, then release the lever and repeat till (no) fade. Bosh.
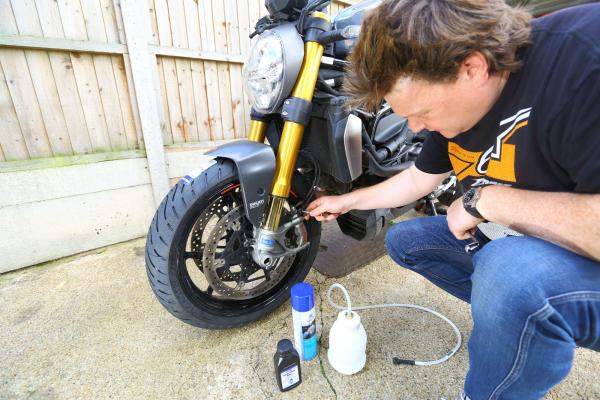
Nowadays though, there are various gadgets to help speed up the process. This white bleeding jar from BikeIt has a one-way valve in the bleed hose, so you just open the nipple and pump the fluid through – the valve stops air getting sucked back into the caliper when you release the brake lever.
Another option is a vacuum pump setup, like this one from Venhill. This sucks fresh fluid down through the lines rather than pumping from the master cylinder, so quickly draws out any air and old fluid. A cheap ersatz option is a big old syringe: connect it to the bleed nipple with some clear hose, open the nipple and suck the air and old fluid out. It's a messier, less slick option, but very cheap.
Plenty of new brake fluid is a must. It's cheap stuff, so don't cut corners by reusing old fluid – and remember that once a bottle is opened, it has a short shelf life. Normal brake fluid is hygroscopic – meaning it absorbs water vapour from the air. So if you have contaminated fluid in your brakes, when they get hot, the water turns to tiny bubbles of steam. And since steam is compressible (fluid isn't), your brakes go spongy, and can ultimately stop working altogether. New, dry fluid will take much more heat before any problems appear.
Small 250ml bottles like this Liqui-Moly fluid make more sense than bigger litre bottles, especially if you only use a little bit every now and again.
Remove the lid from the reservoir, and make sure the fluid is topped right up before you start. If you forget to keep an eye on the level, and the reservoir runs dry, you'll get air into the lines and have to start all over again (we'd never do that though, oh no, not us…)
Connect your bleeding setup to the nipple, and loosen it off with a good quality, well-fitting spanner. Then pump the lever, or operate the vacuum pump until the fresh fluid comes through, and there are no bubbles in the line. The new fluid will be a lighter yellow colour than the old stuff – it gets darker as it ages, like whisky (but not as tasty…) Once done, tighten the nipple up again (carefully – they're not very strong, and a sheared-off nipple is a miserable thing to fix), remove the hose, refit the nipple over and reservoir and you're done.
Brake fluid is nasty stuff for your skin and for paint. Wear gloves, and make sure you rinse any spillages off fuel tanks or wheels ASAP. The good thing is that unlike engine oil, it can be rinsed off easily with lots of plain water.
For road use, DOT4-spec glycol fluid is more than good enough. Racers might use DOT5.1, which has a higher boiling point, but also absorbs water faster, and needs replacing more often – but racebikes generally have the brakes bled for every race (sometimes for every session…)
DOT3 is an older standard, with a lower boiling point – it’s often used in clutch hydraulic systems which don’t have to deal with so much heat.
DOT5 fluid is a silicone-based fluid, and can't be mixed with other fluids (DOT3, DOT4, DOT5.1). It's used in very cold climates and by some industrial and military users. Best avoided for 99.9 per cent of riders.
CLICK HERE FOR MORE VISORDOWN HOW-TO GUIDES.


