How to… fit new big end and main bearings
Don't say we only help with the simple stuff
By Alan Dowds
OKAY, we had some moans about our how-tos being a bit easy. We all have to learn somewhere though – and not everyone can be a MotoGP-spec spanner god like you (yes, we mean you).
So, here's a big 'un for you. A vital part of a major four-stroke engine rebuild is fitting new shell bearings on the crankshaft journals. Here's how (and why) to do it…
1. Know your journals
Plain journal bearings are half-circles (well, sort of hollow cylinder halves) made of a special soft metal. They're used in most crankshafts in two places: the main bearings, which sit in the crankcases, and hold the crankshaft steady as it spins. The other place is at the 'big end' of the conrods which connect the pistons to the offset arms on the crankshaft. The places where the bearings face the crankshaft are called the journals – a four-cylinder engine (usually) has five main bearing journals and four big end journals.
The important part is the oil pressure inside the engine: this is piped to the crankshaft bearings, and it's this pressure that makes the plain bearings work. The crank actually spins on a cushion of high-pressure oil, so the bearings should never really wear in normal use – there's a little bit of contact when the engine starts, but this will quickly stop once the oil pump starts working.
If the oil pressure drops, or the oil is too old to keep its friction-busting powers, then the bearings start to touch the crank journal surface, and the bearing shell quickly wears away.
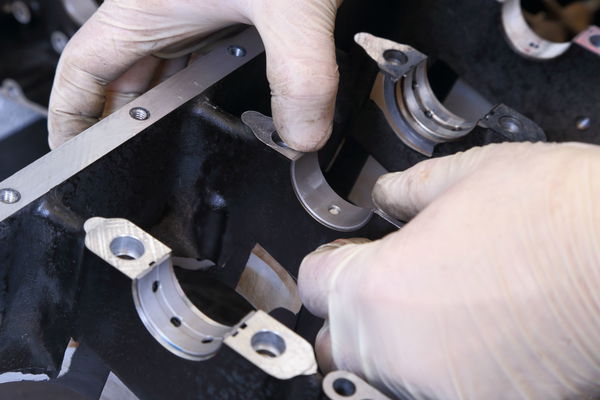
Our picture shows and old bearing shell on the left and a new one on the right.
To keep this oil cushion working well, we need a very accurate gap between the bearing shell and the crankshaft journal. It's a very small gap – in the order of hundredths of a millimetre. So how the feck do we measure that? Well, if you're a bike factory, or a megabucks engine builder then you have eye-bleedingly accurate bore gauges and micrometers, which you use to measure the inside diameter of the bearings, and the outside diameter of the journals…
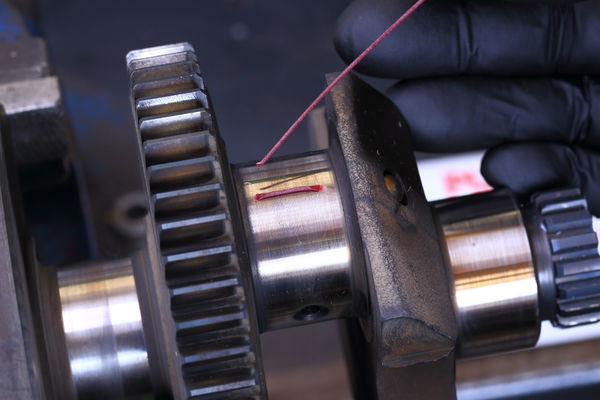
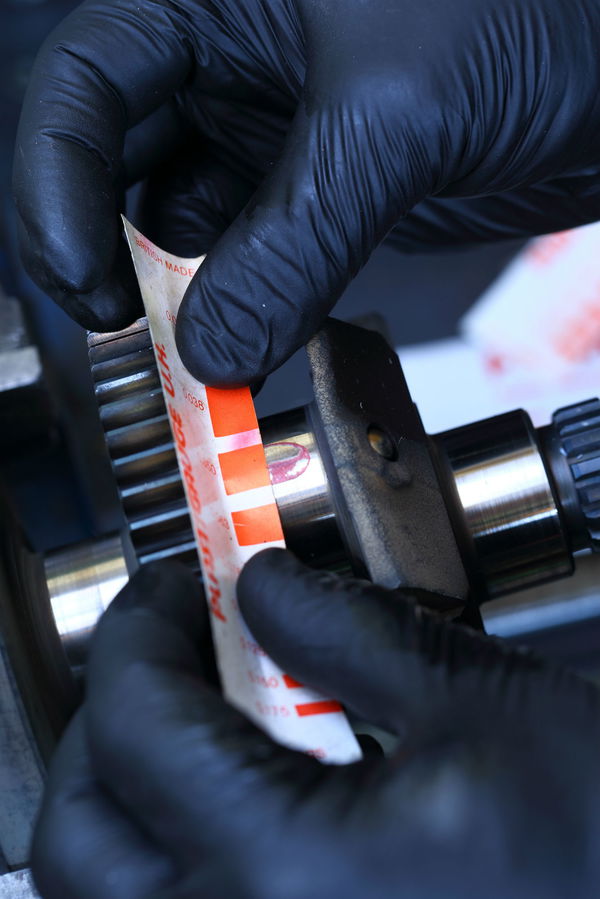
Working class engine builders use something else though: Plastigauge. This is pieces of very carefully made thick plasticine-type material, which you place in between the bearing face and the journal, then tighten up the bearing halves. Take it apart again, and the Plastigauge has been squashed flat – to the thickness of the clearance inside the bearing. Now, because it's been very accurately made, measuring the width of the squashed section tells you what the bearing clearance is. It sounds properly Heath-Robinson, but it works…
The big part is, of course, getting the entire engine out and apart to get at the crank. Once done, inspect the crank journals – any scoring, scuffs or scrapes mean you need to get it overhauled – call a professional now. If it's okay, check the bearing shells that are fitted – they often have coloured markings or stamped numbers. Refer to the service manual for guidance on your engine.
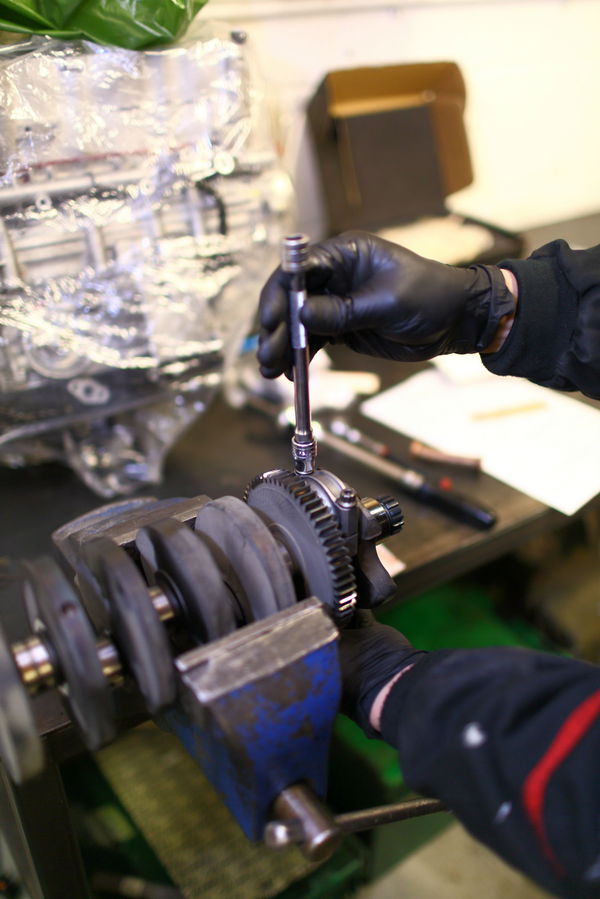
Once you have the new bearings, clean everything with brake cleaner, then assemble the bearing shells inside the conrod or main bearing mounts. Cut off a length of Plastigauge and lay it across the bearing, at 90° to the rotation (as shown above). Bolt the bearing cap on, and torque it to the right spec for the engine. Take care not to turn anything: that will mash the Plastigauge all round the bearing.
Carefully loosen the bearing halves again, then use the Plastigauge measuring sheet to work out the bearing clearance from the width of the strip. If it’s within the tolerances in the service manual, you're good to go! If not, you might need different sized bearing shells – again, the service manual will help here…
